Resident portal
The Resident portal lets residents report maintenance problems with photos and follow each one until it is done. The office reviews every request, keeps the resident list and answers complaints from the same place.
- Who sees it
- The property manager, the assistant property manager and the maintenance supervisor see the Residents tile. Only the property manager reads complaints and the Reviews tab.
- Where to find it
- On the home screen: Residents, and Resident complaints under People.
- What it needs
- The module Resident portal turned on in Modules. Residents use their own link on a phone or a computer.
Find a resident and keep the list
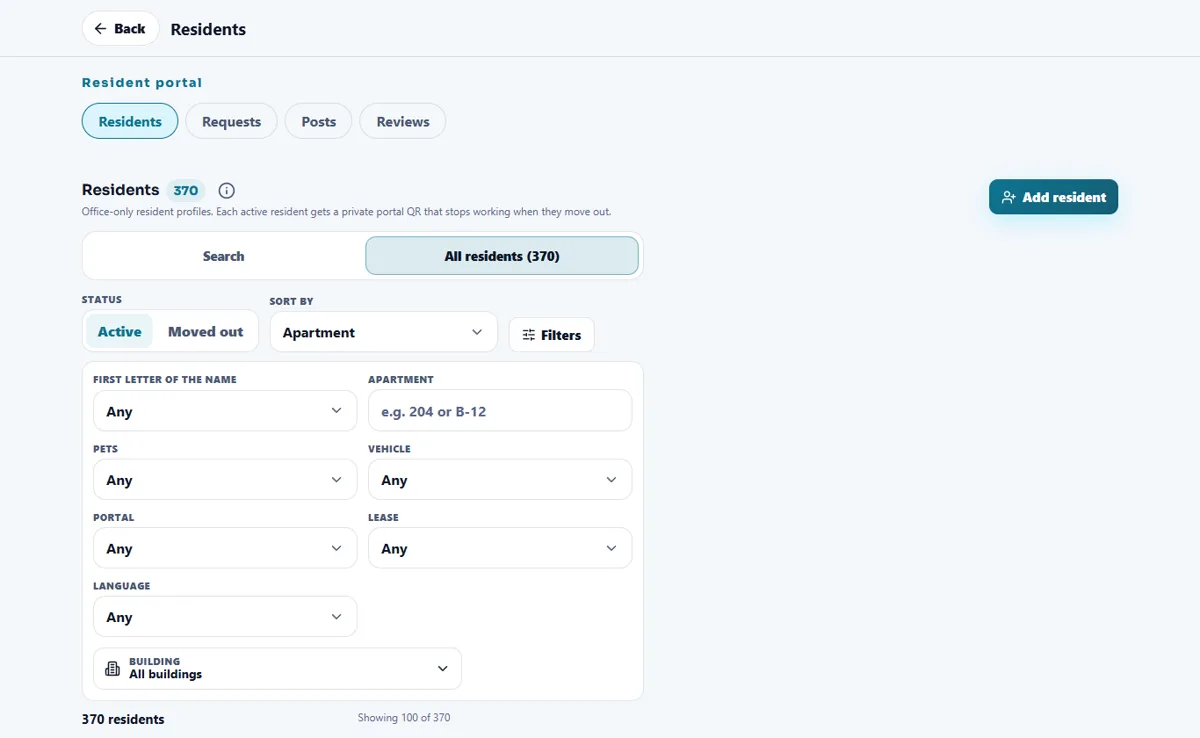
Open Residents. The window has four tabs: Residents, Requests, Posts and Reviews.
- Search for one person
On the Search tab type a name, apartment, phone, email or license plate. Under Search in you can narrow it to Name, Apartment, or Phone or email.
- See everyone
Open All residents. Choose Active or Moved out, pick how to sort, then tap Filters to narrow by first letter of the name, apartment, pets, vehicle, portal, lease, language or building.
- Add a resident
Tap Add resident and fill in the apartment, the main resident, the people who live with them, unit access, pets, vehicles, an emergency contact and office notes. The email you type is the one the resident signs in with.
- Send a notice to the people you filtered
When you may publish notices, Send a notice to these residents opens a new post already aimed at those buildings. See Resident announcements and events.
Give a resident access
Open a resident to see their file. Each active resident has a private portal QR that stops working when they move out.
- Share the portal QR
The file shows Portal QR. Share it only with that resident. They must also sign in with the email you registered. New portal QR makes a fresh one.
- Send access again
Send access again emails a fresh sign-in link to the registered address. The previous link and QR stop working.
- Change the email
Change email asks for the new address and a reason. The old address loses access right away. The reason is saved with your name in the activity log.
- Mark a move-out
Move out stops the QR and the portal at once. Personal data, codes, photo and ID are deleted. The maintenance history of the apartment stays.
The door code never appears in a list. Only the supervisor, the property manager and the assigned technician (when the resident allows entry) can see it, and every view is recorded. The ID file is private: only managers and supervisors of the property can open it.
Turn a request into a work order
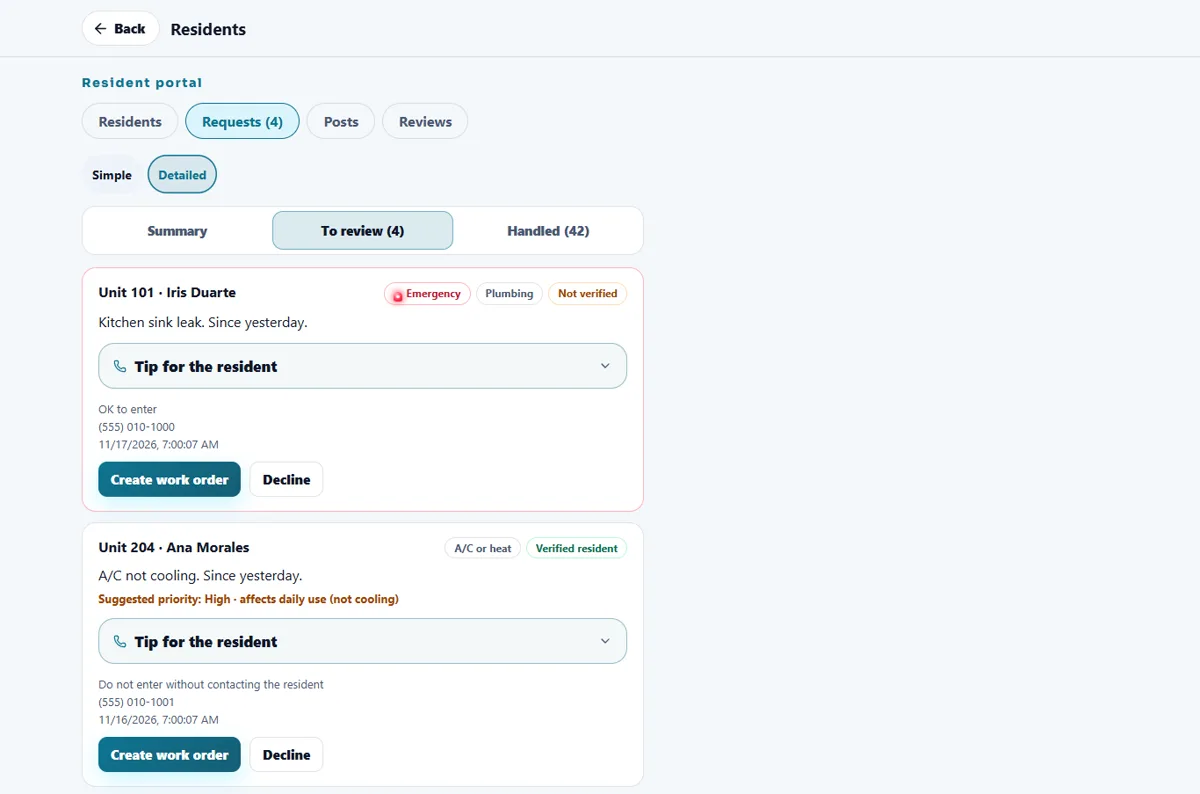
A resident request waits in Requests. The tab and the tile show how many are waiting.
- Open the request
Under To review each card shows the apartment, the resident, the category, the photos, when they are home and whether you may enter. An emergency has a red Emergency label. A suggested priority and a tip to read to the resident appear when they help.
- Create the work order, or decline
Tap Create work order, choose the priority and who it goes to, then Create. Or tap Decline and write an optional reason the resident will read.
- Close it for the resident
When the work is done, open the finished order in Work orders, choose the photos to share, add a short message and tap Mark as completed for the resident. The resident keeps seeing it as in progress until you do. Take back undoes it.
Use the Simple and Detailed buttons to change how the list looks. Handled is grouped by month.
Complaints
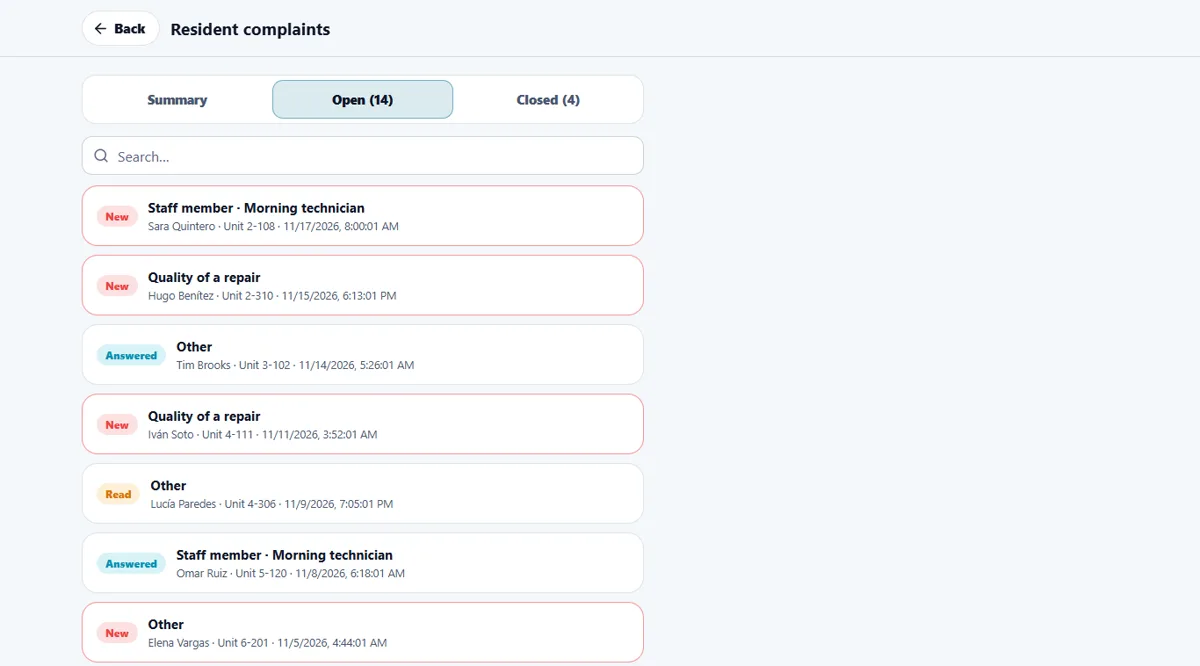
A resident can send a complaint about a staff member, the quality of a repair or something else, with up to four photos. Only the property manager reads them.
- Open Resident complaints
Use the tile on the home screen. Opening a complaint marks it as read for the resident.
- Reply
Write your answer and tap Send reply, Reply and close or Close without reply. The resident sees the answer in their portal.
- Delete when you want
Complaints, replies and photos are deleted after 30 days. Delete removes one at once, for you and for the resident.
Reviews
On the Reviews tab the property manager pastes the link to the property's public review page. Every resident then sees a rate-us button in their portal, and again after each finished job in their apartment. The tab counts taps on the button, not posted reviews.
What the resident sees
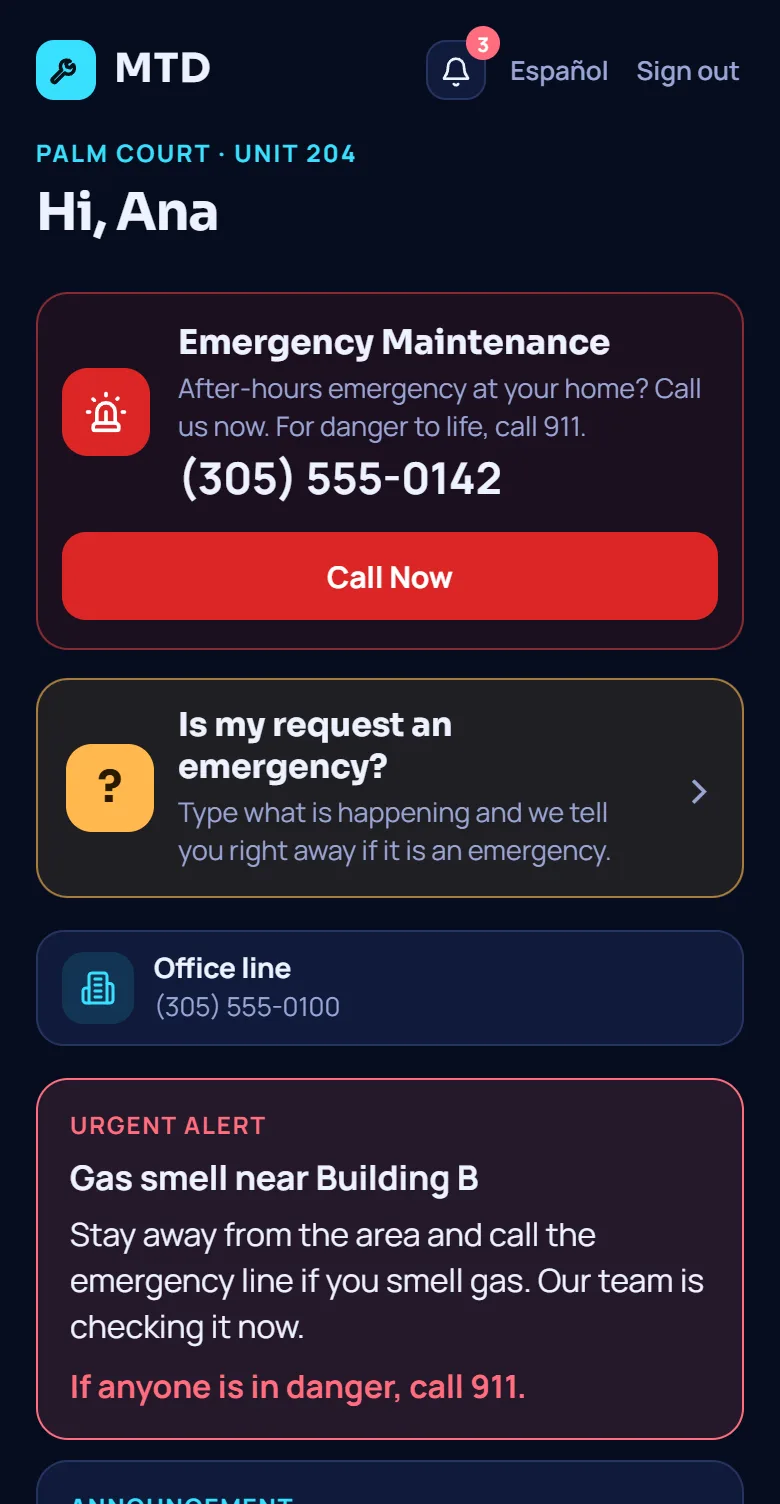
The full walk-through is in Start here: Resident. In short, the resident opens their link, signs in with their email, writes what is wrong, adds photos or one short video and follows the steps until the work is done. The portal also has Complaints, Events, Notifications and My apartment, where the resident keeps their pets and door code.
- Joining a property
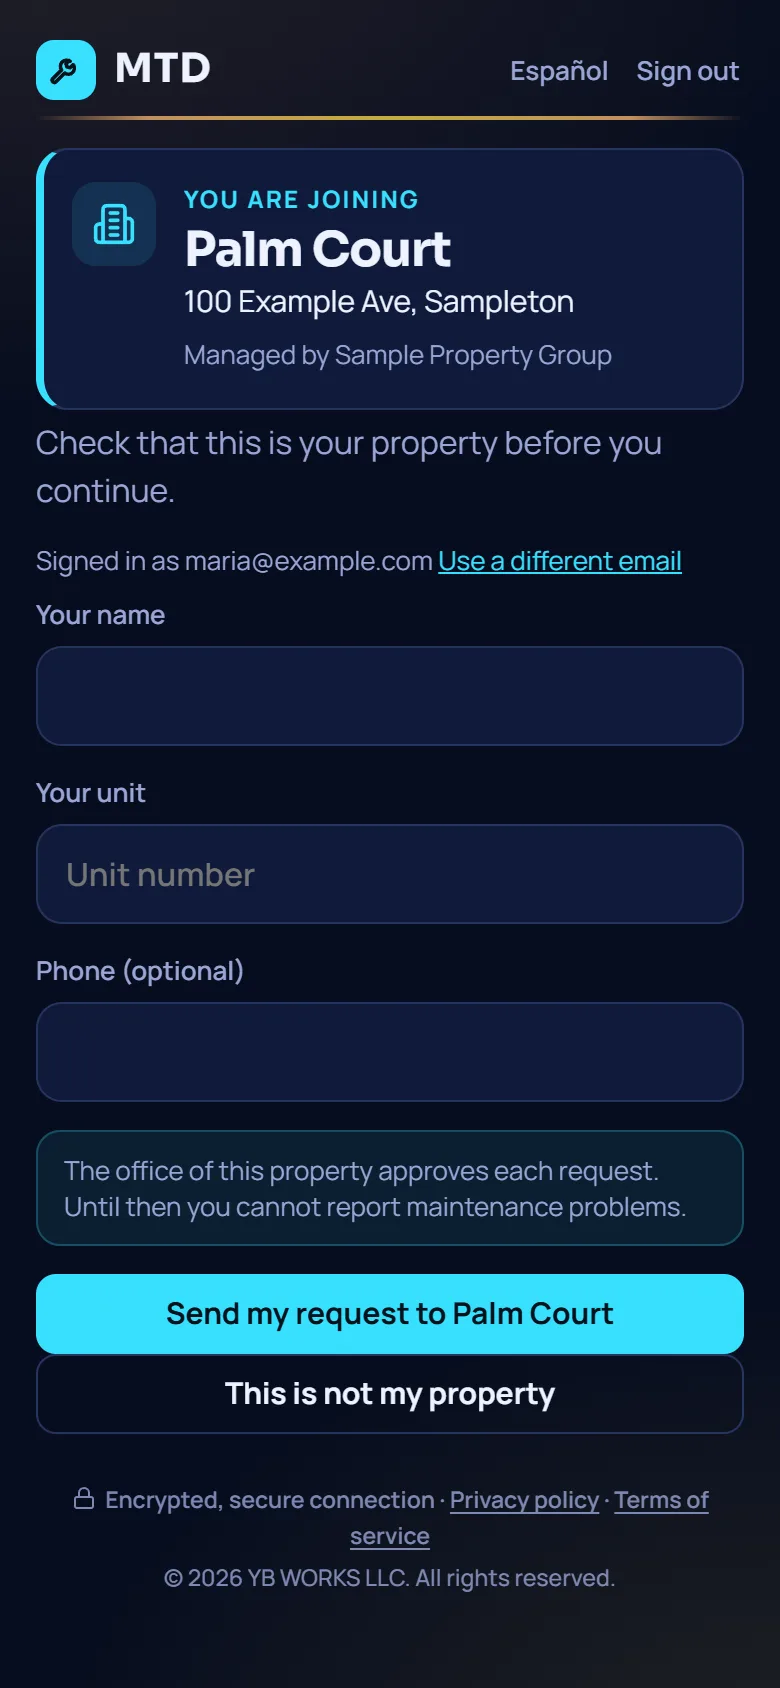
A resident can scan the property QR. The screen first shows the property name and address. After the resident sends their name and unit, the office of that property approves the request. Until then they cannot report problems.
- Notices they get
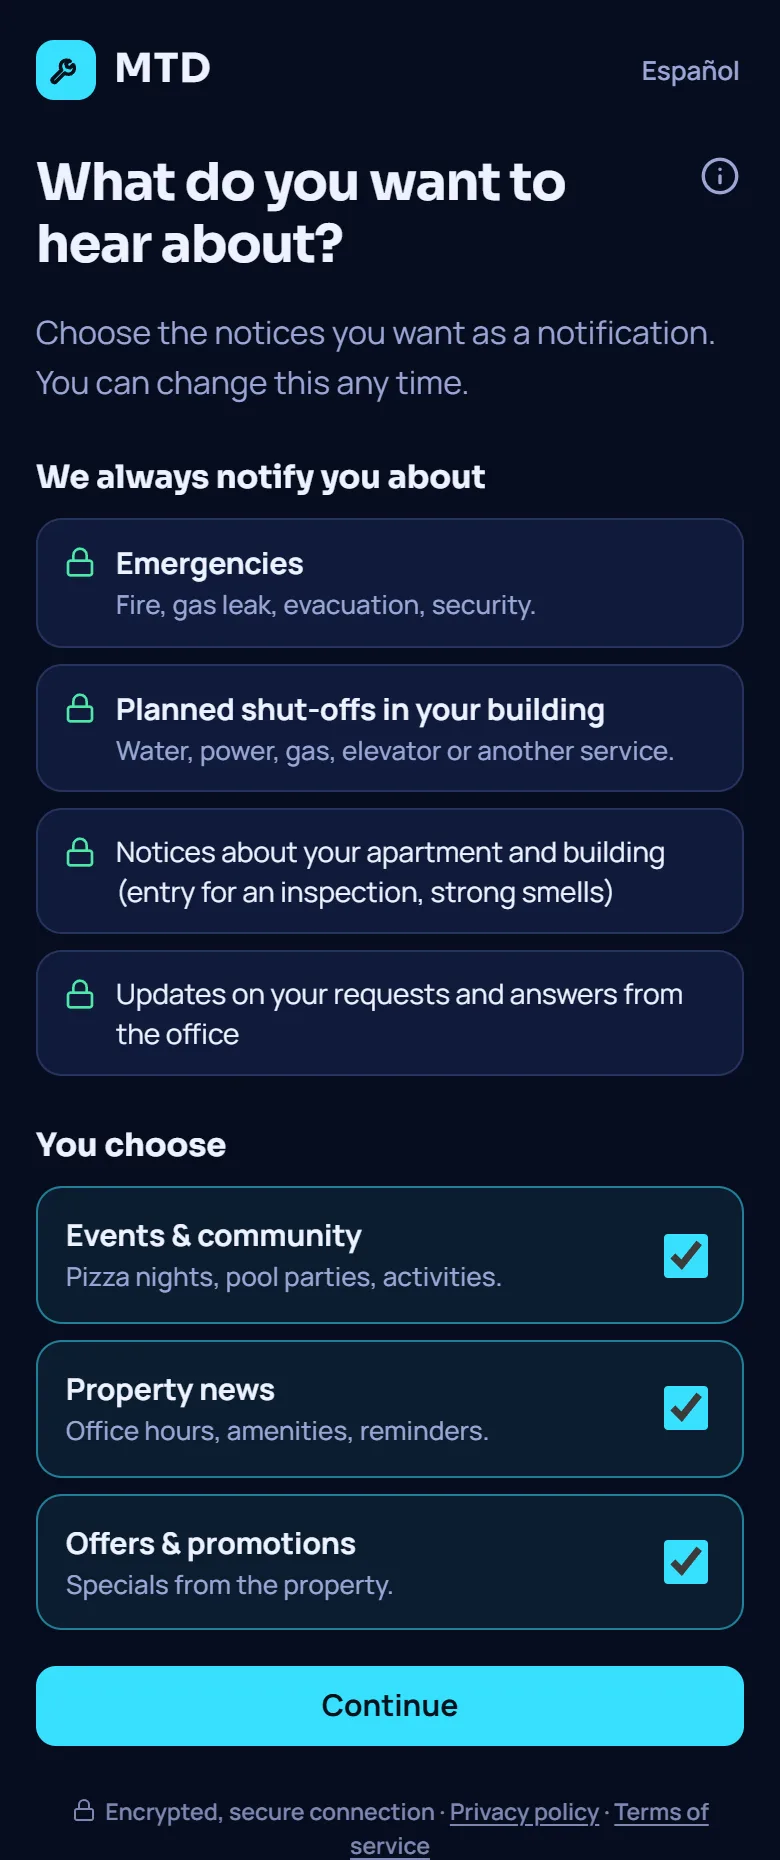
The first time, the resident chooses what they hear about. Emergencies, planned shut-offs, notices about their own apartment and updates on their requests always arrive. Events & community, Property news and the offers topic can be turned off. The office only sees how many residents turned a topic off, and only for groups of five or more, never names.
- PIN protection
In Security & devices a resident can ask for a 4-digit PIN each time the portal opens, so a child holding the phone cannot send requests. After five wrong tries the PIN locks for a while.
Tips
Check Requests first thing in the morning. If a resident calls while you look at a card, open its tip and read it to them.
When the module is turned off
The Residents, Resident complaints and Staff comments tiles disappear. Residents cannot send requests, complaints or comments, and the resident cards on work orders (on my way, apartment heads-up, resident rating) are not shown. Turning a module off hides it and keeps its data: the residents, requests and posts come back when the property manager turns the module on again in Modules.
Related guides
Ready to try it with your own property?
Create your workspace, add your property and turn on the modules you need.