Resident announcements and events
Publish notices, events, planned shut-offs and urgent alerts to the residents of a property, or only to one building. Residents read them in their portal and get a notification on their phone.
- Who sees it
- The property manager, the assistant property manager and the maintenance supervisor can publish. Only the property manager and the maintenance supervisor can send an emergency alert.
- Where to find it
- Residents › Posts tab. From a building, Notify the building opens the same form.
- What it needs
- The module Resident announcements & events, and the Resident portal, turned on in Modules.
What it is for
One place to tell residents what is happening: the pool reopens, a community breakfast, the water is off in Building 4 for two hours. You choose who receives it, and the screen tells you how many residents it will reach before you publish.
Publish an announcement or an event
- Start a post
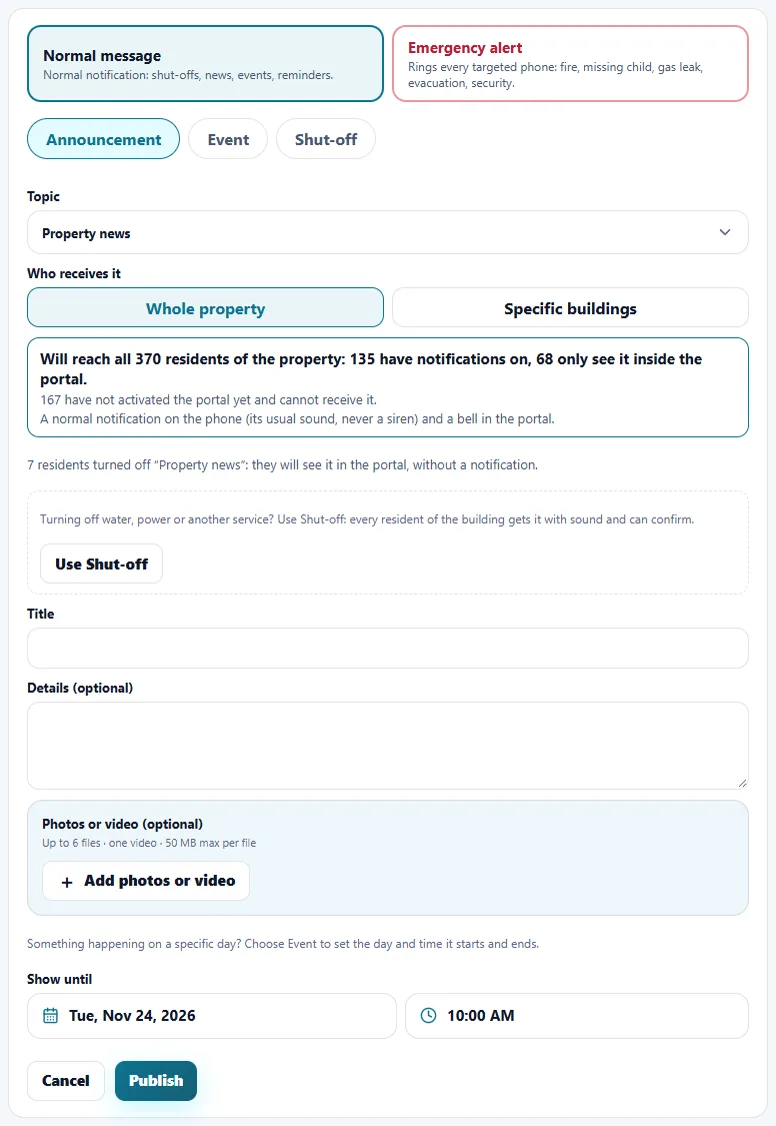
Open Residents › Posts and tap New post. Under Normal message choose Announcement or Event.
- Choose the topic
Pick Events & community, Property news or the offers topic. Residents can turn a topic off for notifications, so the screen shows how many did.
- Choose who receives it
Under Who receives it pick Whole property or Specific buildings and choose the buildings. A line tells you how many residents it will reach, how many have notifications on and how many have not activated the portal yet.
- Write it
Add a Title and optional Details. You can attach up to 6 photos or videos (one video, 50 MB at most per file).
- Set the end date
An announcement needs Show until: it disappears from the resident board after that date. An event has a start, an end and a place instead, and residents get Add to calendar.
- Publish
Tap Publish. If your company has email turned on, Important: also email every resident sends it by email too.
Announce a planned shut-off
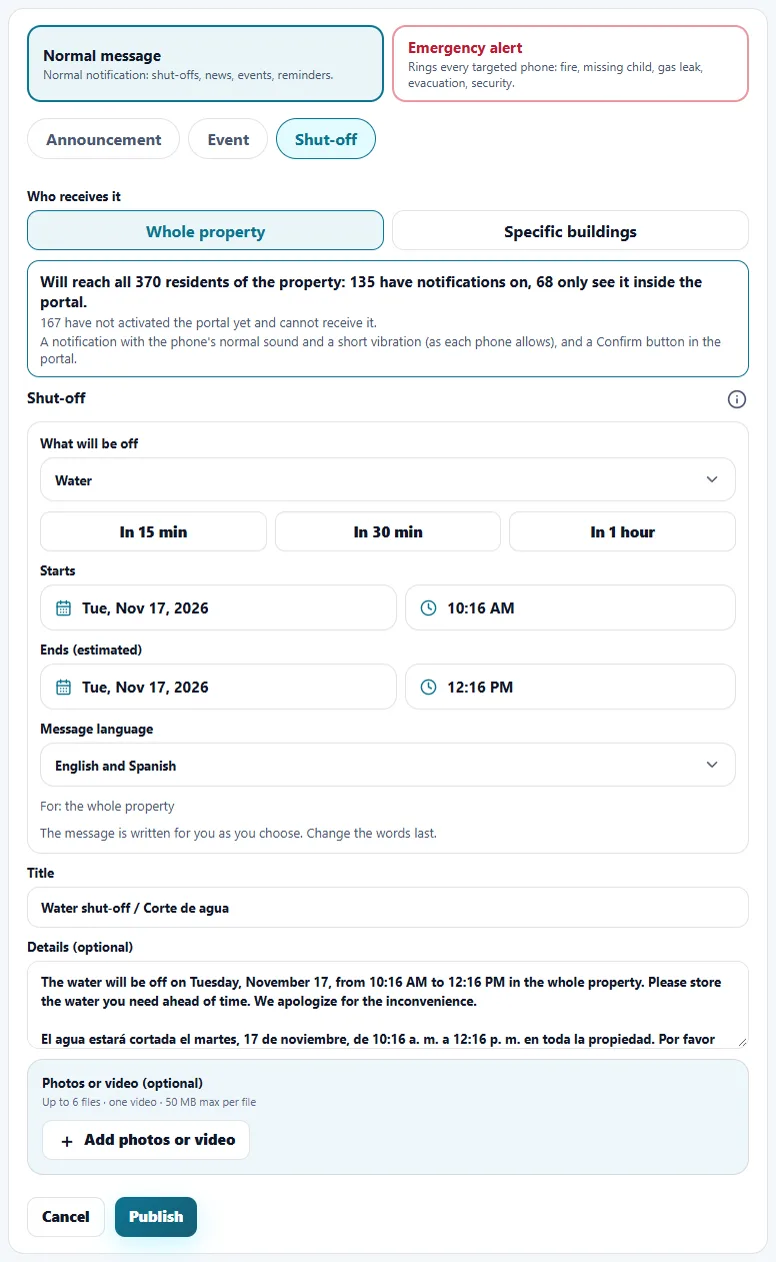
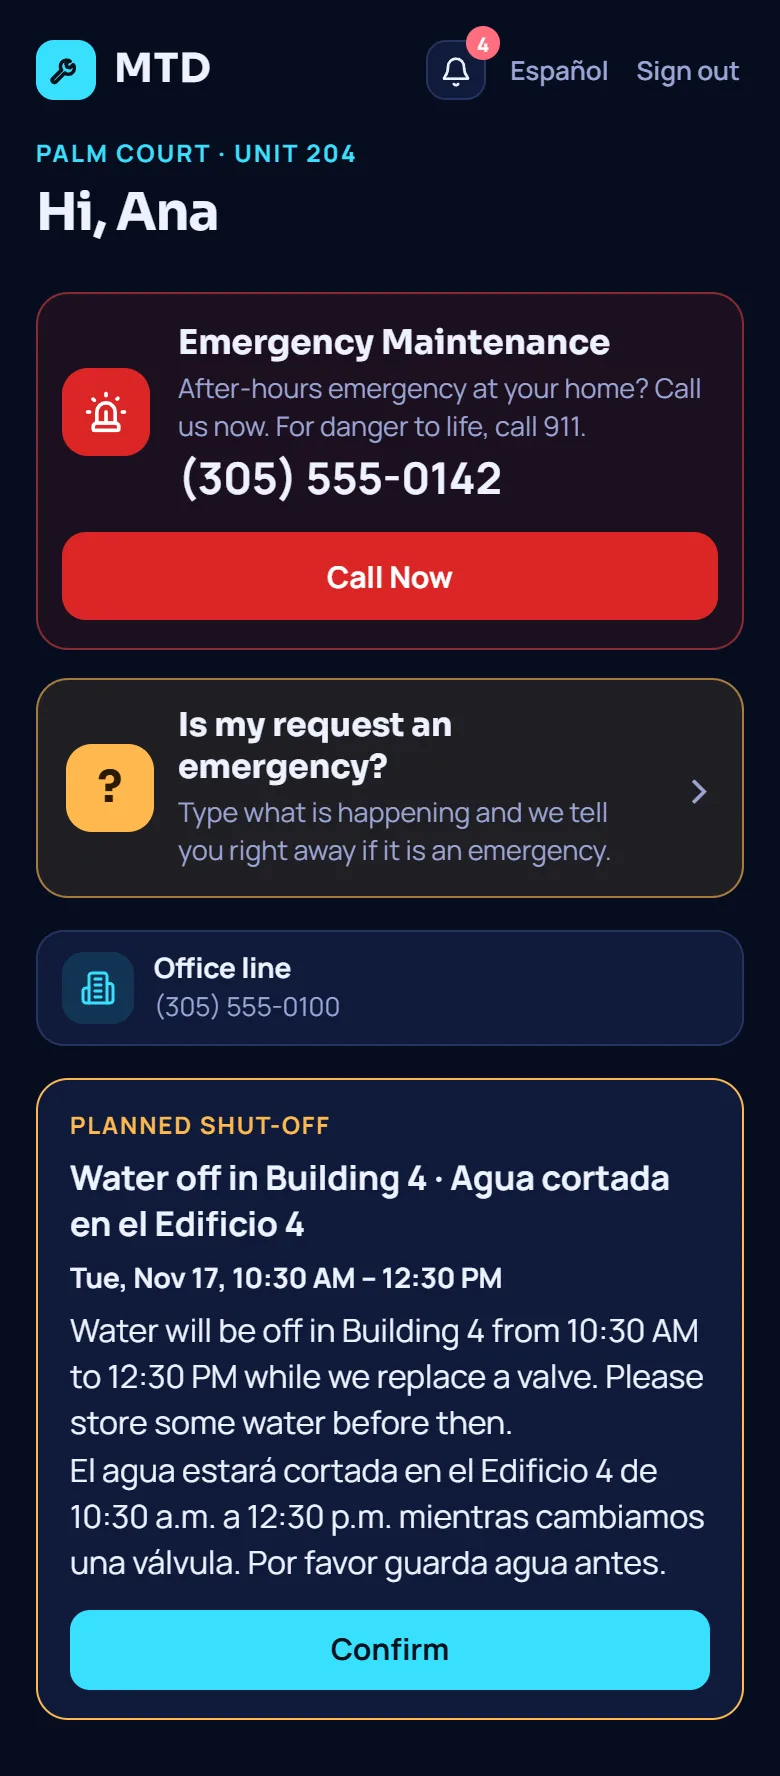
Use Shut-off when water, power or another service goes off in a building. Every resident of those buildings gets it with sound, even if they turned other topics off, and has one Confirm button.
- Choose Shut-off
In New post tap Shut-off. Choose What will be off: water, electricity, gas, heating or A/C, elevator, internet or something else.
- Set the time
Choose Starts and Ends (estimated), or use a quick start (in 15 minutes, 30 minutes or 1 hour). A shut-off can be announced up to 21 days ahead and can last up to 7 days.
- Choose the buildings and the language
Pick the buildings. The message writes itself in English and Spanish, or in one language, and you can change the words before publishing.
- Watch the confirmations
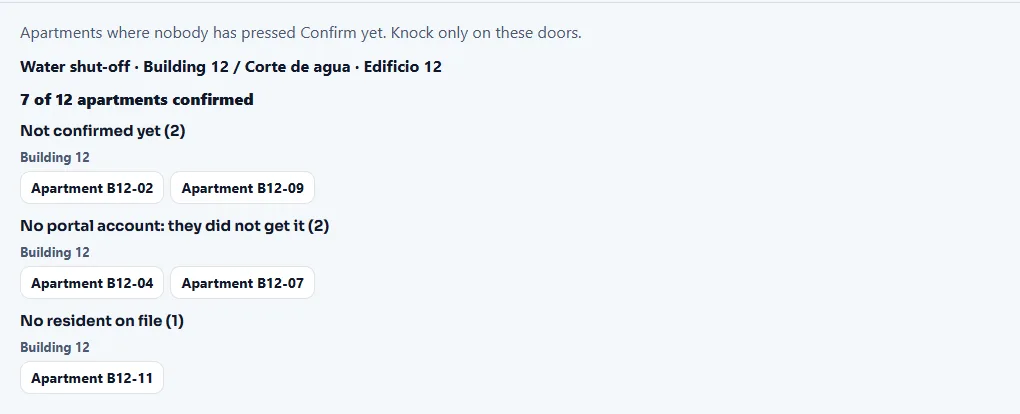
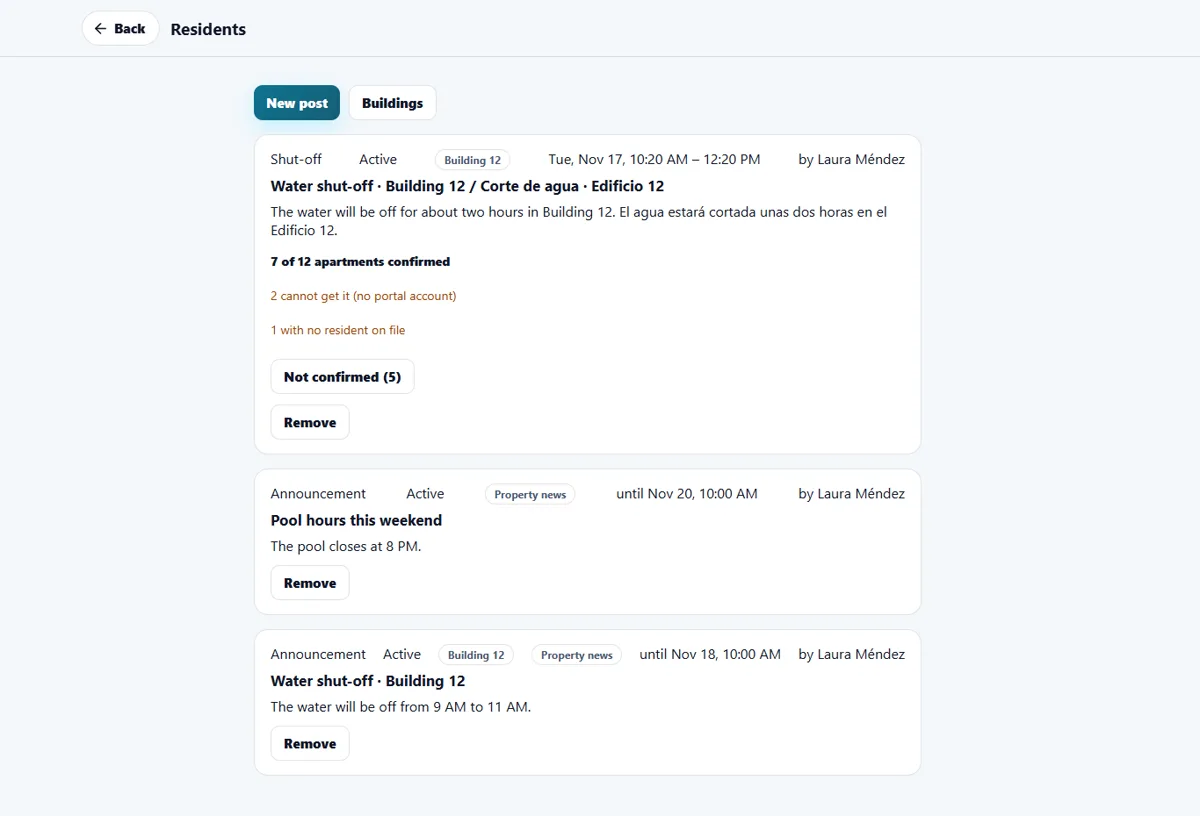
The notice shows, for example, 7 of 12 apartments confirmed. Tap Not confirmed to see the apartments that have not pressed Confirm, so you knock only on those doors. The list also shows apartments with no portal account, which did not get it, and apartments with no resident on file.
Sending a notice to one building is also possible from the Buildings tile: open a building and tap Notify the building. See Apartments and buildings.
Send an urgent alert
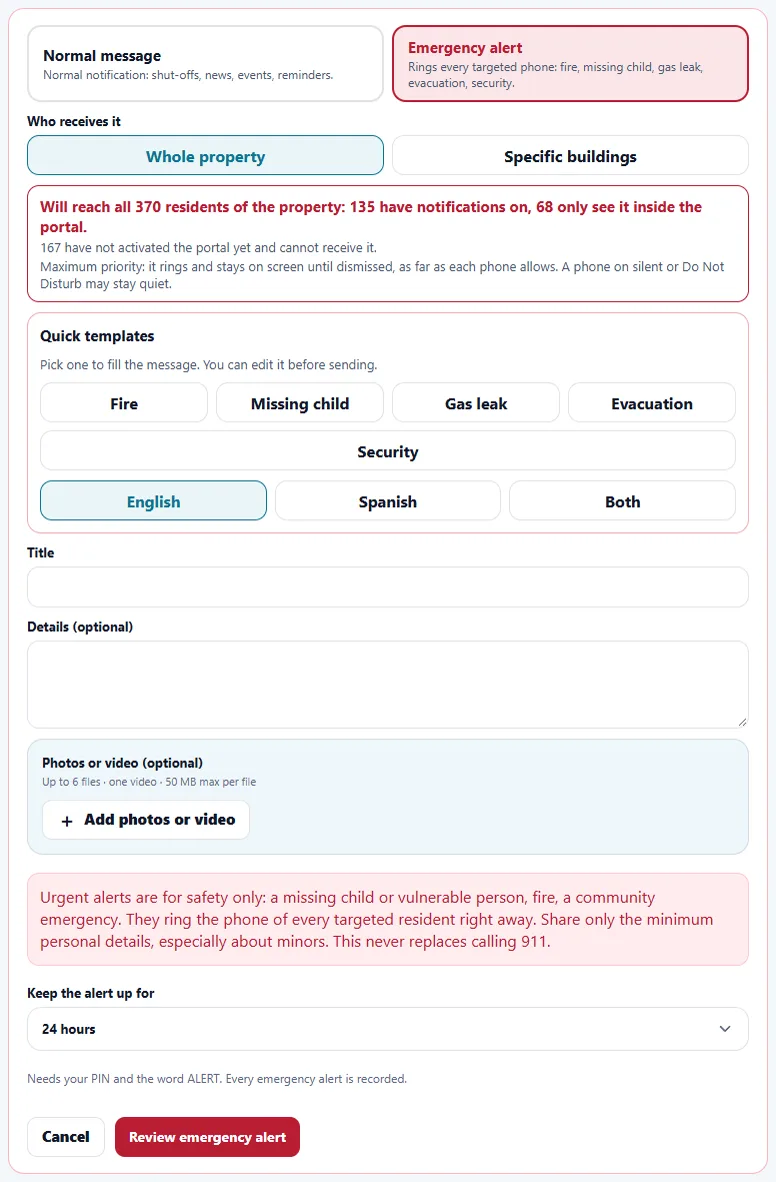
Urgent alerts are for safety only: a missing child or vulnerable person, a fire, a community emergency. They ring the phone of every resident you choose. They never replace calling 911.
- Choose Emergency alert
In New post choose Emergency alert instead of Normal message. Pick the whole property or specific buildings, and how long to keep the alert up (6, 12, 24, 48 or 72 hours).
- Review it
Tap Review emergency alert. The screen says how many residents' phones will ring.
- Confirm
Type the word ALERT, tap Send emergency alert and enter your PIN. Every emergency alert is recorded.
Share only the minimum personal details, especially about children. Use Mark resolved on the alert when the situation is over.
What residents see
An urgent alert appears at the top of the resident home in red, with a reminder to call 911 if anyone is in danger. Announcements show Until and the end date. Events show the day, the place and Add to calendar. A shut-off shows its time and the Confirm button, which then changes to Confirmed. Every notice also arrives in the bell of the portal, where notifications are deleted after 30 days. A normal notice makes the phone's usual sound, never a siren. An emergency alert rings at the highest priority. A phone on silent stays quiet.
Manage what you published
The Posts tab lists every post with its state: Active, Expired, Removed or Resolved. Remove takes a post down. For a shut-off, the list shows the confirmations.
On a vendor job or a Make Ready step, Strong smell — notify the building tells the residents of that building the evening before (about 6 PM) and the morning of the job (about 7 AM). It is checked for you on a bathtub refinishing job.
When the module is turned off
You cannot publish announcements or events. Planned shut-offs and urgent alerts stay available, because they are about safety. The notice choices of residents (events, news, offers) are not shown. Notices already published are kept.
Related guides
Ready to try it with your own property?
Create your workspace, add your property and turn on the modules you need.